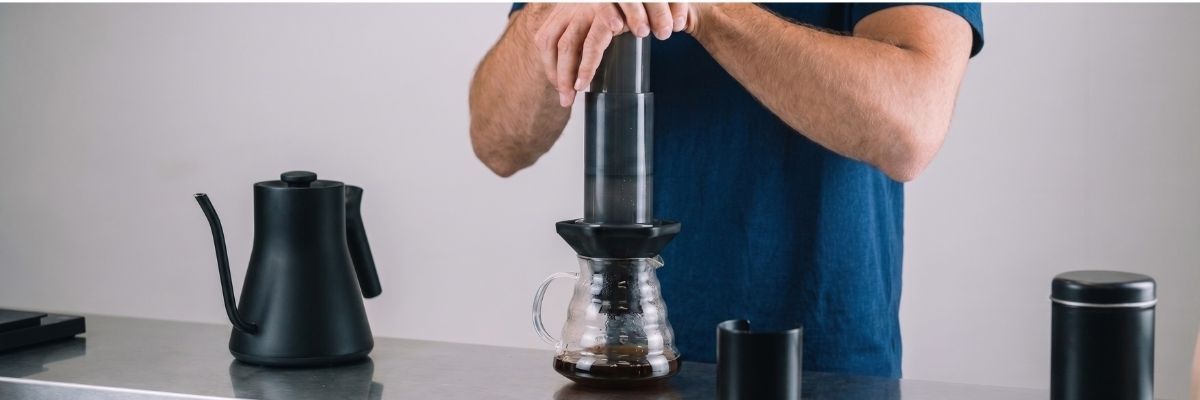
AeroPress is a brewing method in which water passes through ground coffee under light hand pressure.
In the cup, AeroPress sits somewhere between classic filter coffee and fuller-bodied brewing methods. Thanks to the paper filter, the drink is cleaner than French press coffee. Thanks to pressure, it is fuller than coffee brewed with V60, Kalita, or a drip coffee maker.
This is why AeroPress is valued for its flexibility. You can adjust grind size, temperature, contact time, water amount, and pressing pressure.
But for a consistent result, it is better to start with a basic standard method rather than experiments. In this article, we focus on the standard method: the AeroPress stands on a cup or server with the filter facing down, and after brewing, the coffee is pressed through with the plunger.
What You Need
For a basic brew, you will need:
- whole bean coffee or ground coffee;
- an AeroPress;
- paper filters;
- hot water;
- a cup or server.
It is useful to have:
- a kitchen scale;
- a coffee grinder;
- a timer;
- a temperature-controlled kettle or thermometer.
A scale and timer are not there to make the process complicated. They are there to make the result repeatable. If the coffee tastes good, you should know how to brew it the same way next time.
How AeroPress Differs from Other Brewing Methods
AeroPress combines three things:
- coffee-to-water contact;
- paper filtration;
- plunger pressure.
In a French press, coffee also stays in contact with water, but filtration happens through a metal mesh. That means more oils and fine particles end up in the cup.
With V60 or Kalita, water passes through the coffee by gravity. The result depends more on pouring technique, dripper shape, and flow rate.
With AeroPress, you control part of the process by hand. After a short brew, you press the water through the coffee and paper filter. This can give you a cup that is clean, but still quite full-bodied.
What Grind Size to Use for AeroPress
A good starting point is a grind slightly finer than medium.
Use this simple guide:
- finer than V60 or Kalita;
- coarser than espresso;
- closer to a fine filter grind.
If the grind is too fine, the plunger will be hard to press, and the coffee may become bitter, dry, or too heavy.
If the grind is too coarse, the water will pass through faster, and the taste may be thin, slightly sour, and underdeveloped.
For the first recipe, use a grind slightly finer than pour-over, then adjust it by taste.
How Much Coffee to Use
A basic AeroPress dose is:
18 g of coffee
This is a practical starting point for a recipe using 180 ml of water.
The ratio is simple:
18 g of coffee to 180 ml of water
This gives you a fairly rich cup. If you want a lighter taste, you can slightly increase the amount of water or dilute the brewed coffee after pressing.
If you want a fuller cup, keep 180 ml of water but grind slightly finer or increase the coffee-to-water contact time.
Water Temperature
For a basic AeroPress recipe, a good temperature is around:
90°C
If you do not have a thermometer, bring the water to a boil and wait 1–2 minutes.
One important note: AeroPress inventor Alan Adler recommended a lower temperature, around 80°C. But most modern specialty coffee recipes more often use water around 90°C, so that is a better starting point.
Water that is too hot can make the taste sharper and more bitter. Water that is too cool can produce a weak and underdeveloped cup.
Preparing the Filter
Before brewing, prepare the paper filter.
The process is simple:
- Place a paper filter into the filter cap.
- Rinse the filter with hot water.
- Discard the water from the cup or server.
- Screw the filter cap onto the AeroPress.
Rinsing the filter helps remove any possible paper taste and also slightly warms the AeroPress parts and the cup.
Basic AeroPress Recipe Using the Standard Method
This recipe is a good place to start.
Coffee: 18 g
Water: 180 ml
Temperature: 90°C
Grind size: slightly finer than medium
First pour: 50–60 ml
Second pour: 120–130 ml
Total time before pressing: about 1 minute 10 seconds
Press time: 20–30 seconds
Step-by-Step Brewing
- Heat the water to 90°C.
- Place a paper filter into the AeroPress filter cap.
- Rinse the filter with hot water.
- Screw the filter cap onto the AeroPress.
- Place the AeroPress on a cup or server.
- Add 18 g of ground coffee.
- Pour in 50–60 ml of water.
- Wait 30 seconds.
- Add the remaining water up to a total of 180 ml.
- Insert the plunger on top and pull it back slightly to create a vacuum and stop the coffee from dripping through.
- Wait another 40 seconds.
- Remove the plunger.
- Gently stir the coffee.
- Insert the plunger again.
- Press smoothly for 20–30 seconds until all the liquid is in the cup.
- Stop when you hear the characteristic hiss.
- Remove the AeroPress from the cup.
- Discard the used filter and coffee grounds.
- Stir the finished drink in the cup and let it cool slightly.
When coffee cools slightly, the taste becomes easier to read. A drink that is too hot can seem flatter because high temperature dulls taste perception.
Why Pour Water in Two Stages
A two-stage pour helps make extraction more even.
The first pour wets the coffee and allows it to start interacting with water. For 18 g of coffee, 50–60 ml of water is enough.
After 30 seconds, you can add the remaining water — about 120–130 ml if the total recipe volume is 180 ml.
This gives the coffee time to wet evenly before the main brew. It is especially useful if the coffee is fresh or the grind is slightly finer.
How to Press the Plunger
Press the plunger smoothly, without sudden force.
A normal press time is 20–30 seconds.
If the plunger moves too easily, the coffee may taste thin. The reason may be a grind that is too coarse or not enough brew time.
If the plunger is very hard to press, do not force it. Most often, this means the grind is too fine. Strong pressure can make the process less controlled and the taste rougher.
AeroPress does not need aggressive pressing. It is better to keep steady pressure and let the water pass through the coffee gradually.
Should You Press All the Way Down?
Press until almost all the liquid has moved into the cup and you hear the characteristic hiss.
Then you can stop.
You do not need to aggressively squeeze out the last drops. The final part can bring more bitterness and dryness. If your coffee often tastes rough, try stopping the press slightly earlier.
How to Know What to Change
The coffee tastes sour, thin, or underdeveloped
Increase extraction. You can make the grind slightly finer, raise the temperature to 92°C, or add 10–20 seconds to the brew time before pressing.
The coffee tastes bitter, dry, or rough
Extraction is likely too high. Make the grind slightly coarser, lower the temperature by 2–3°C, or avoid pressing the plunger all the way down.
The plunger is too hard to press
Most likely, the grind is too fine. Next time, make it coarser. Do not try to force the coffee through.
The coffee tastes watery
The issue may be concentration, not extraction. Try using a little less water without changing the amount of coffee, or avoid diluting the finished drink after brewing.
The taste is too heavy
Try adding a little hot water to the finished drink, or next time use 190–200 ml of water instead of 180 ml.
The main rule is: do not change everything at once. First, fix the dose and water amount. Then adjust the grind size. After that, work with temperature, time, and pressing.
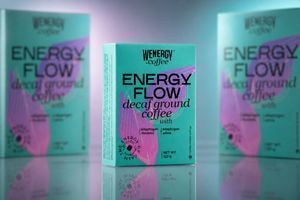
How to Brew WEnergy coffee in AeroPress
WEnergy coffee can be brewed in AeroPress using the standard method. It is a good option when you want a clean but fairly full-bodied cup without a coffee maker.
Basic setup:
- coffee — 18 g;
- water — 180 ml;
- temperature — 90°C;
- grind size — slightly finer than medium;
- first pour — 50–60 ml;
- pause — 30 seconds;
- second pour — up to 180 ml;
- wait after the second pour — 40 seconds;
- press time — 20–30 seconds.
If you use WEnergy coffee ground for AeroPress, you do not need to find the right grind size yourself. You only need to control the dose, water, temperature, time, and pressing pressure.
AeroPress works well for people who want a fuller cup than classic filter coffee, but a cleaner cup than French press. It is a method for home, office, or travel, where the goal is not a complicated process, but a controlled result in the cup.
The Main Point
AeroPress is a method where coffee brews briefly, then passes through a paper filter under hand pressure.
The basic setup is simple: 18 g of coffee. 180 ml of water. Temperature — around 90°C. Grind size — slightly finer than medium. First pour — 50–60 ml for 30 seconds. Second pour — up to 180 ml, then another 40 seconds of waiting. Press time — 20–30 seconds.
If the coffee tastes sour and thin, increase extraction. If it tastes bitter and rough, reduce extraction. If the plunger is too hard to press, make the grind coarser.
The strength of AeroPress is the combination of paper-filter clarity and the body created by pressure. That makes it one of the most convenient ways to brew an expressive cup of coffee without a coffee maker.