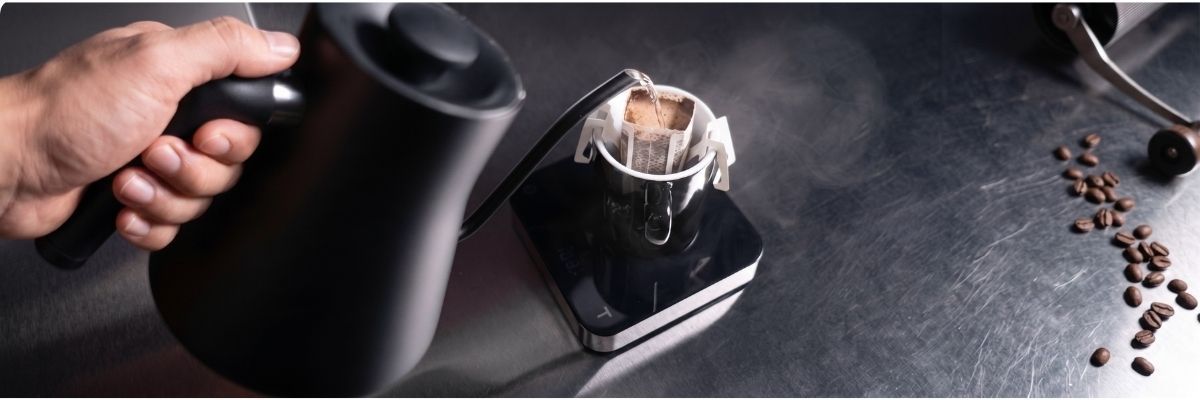
A drip coffee bag is a portion of ground coffee packed in a paper filter with fold-out cardboard holders. You place it directly on a cup and pour hot water through it.
In practice, it is the simplest way to make filter coffee without a coffee maker, V60, Kalita, French press, or separate server. You do not need to choose a filter, weigh the coffee, think about the dose, or carry brewing equipment with you.
That is the main strength of drip bags: they give you the taste of natural ground coffee while keeping the process as simple as possible.
This is not instant coffee and not coffee extract. Inside the drip bag, there is ground coffee. Water passes through the coffee bed and paper filter, and the brewed coffee flows into the cup.
Who Drip Coffee Bags Are For
Drip bags are useful when you want proper coffee but do not have brewing equipment.
People most often take them:
- on the road;
- to the office;
- on business trips;
- to school or university;
- to hotels or apartments;
- home, if they do not want to buy a coffee maker;
- as a backup coffee format for moments when there is no time for manual brewing.
The main advantage of a drip bag is that it already contains one portion of coffee for one cup. You do not need to decide how many grams to use. You only need to choose the right cup, water temperature, and water amount.
What You Need
For a basic brew, you will need:
- one drip coffee bag;
- a tall cup;
- hot water.
It is useful to have:
- a kitchen scale or measuring cup;
- a kettle;
- a timer.
A scale is not required, but it helps you avoid pouring too much water. Too much water is the most common reason drip bag coffee tastes weak and watery.
What Cup to Choose
For a drip bag, it is better to use a tall cup with a volume of at least 250 ml.
This matters for two reasons.
First, the drip bag should not sit in the brewed coffee. If the lower part of the bag ends up in the drink, the coffee keeps extracting for longer than needed. The taste can become heavier and rougher.
Second, a tall cup makes it easier to control the water level. You can see how much you have already poured and avoid weakening the coffee with too much water.
A tall ceramic cup of 250–300 ml is a good option.
How to Prepare the Drip Bag
The process is simple:
- Open the individual package.
- Take out the drip bag.
- Tear off the top edge along the perforation line.
- Open the cardboard holders.
- Place the drip bag on the cup so it sits evenly.
Before brewing, make sure the bag does not hang too low and does not touch the bottom of the cup. Once you add water, it will become heavier, so the cup needs to be tall enough.
How Much Coffee Is in a Drip Bag
In drip bags, the dose is already calculated for one cup. Usually it is about 10–12 g of ground coffee, but the exact amount depends on the producer.
This is why drip bags are convenient: you do not need to weigh the coffee before brewing. But you still need to control the water.
If you use too little water, the coffee will be too concentrated. If you use too much, it will taste watery.
How Much Water to Use for One Drip Bag
A practical starting point:
150–190 ml of water per drip bag
The exact amount depends on the coffee, roast profile, and how full-bodied you want the cup to be.
| Desired Taste | Water Amount |
|---|---|
| Richer cup | 150–160 ml |
| Softer and lighter cup | 180–190 ml |
Do not automatically fill the whole cup. If the cup holds 250–300 ml, it does not mean all that volume should become coffee. Too much water is the fastest way to get a weak cup.
Water Temperature
Drip bags work with the same temperature range as most manual filter methods:
93–95°C
If you do not have a thermometer, bring the water to a boil and wait about 1 minute.
Water that is too hot can make the taste rougher and more bitter. Water that is too cool can produce a weak, flat, and underdeveloped cup.
Start with about 94°C and avoid changing all variables at once.
What Water Works Best
For drip bag coffee, it is better to use drinking bottled water or filtered water with no off-smell.
A practical guide:
- mineral content — about 75–150 mg/l;
- pH — around 7;
- no chlorine smell;
- no noticeable off-taste.
Water strongly affects the taste of coffee. If the water itself tastes unpleasant, the coffee will also taste flat or rough.
How to Pour the Water
You do not need a gooseneck kettle for a drip bag. A regular kettle or thermos is enough.
The main point is not to pour all the water at once.
It is better to pour water in small portions into the center of the drip bag. Wait until some of the water has passed through the coffee, then add the next portion.
Basic sequence:
- Place the drip bag on the cup.
- Pour in the first small portion of water to wet all the coffee.
- Wait 20–30 seconds.
- Add water until you reach about half of the target volume.
- Let the water drip through.
- Add the remaining water in 1–2 pours.
- Wait until all the water has passed through the bag.
- Remove and discard the used drip bag.
Pour calmly, without a strong stream. Do not stir the coffee inside the bag with a spoon, and do not squeeze the bag after brewing.
Do You Need to Bloom the Coffee?
Blooming is not required for a drip bag.
But it can help if the water passes through too quickly and the coffee tastes thin or underdeveloped.
How to do it:
- Pour in a small amount of water to wet the coffee.
- Wait 20–30 seconds.
- Then continue with the main brew.
Do not extend the total brew time too much. A drip bag is designed for quick brewing, so there is no need to turn the process into a long steep.
Total Brewing Time
A practical target for a drip bag:
2–2.5 minutes
If the water runs through much faster, the coffee may taste weak, slightly sour, or underdeveloped.
If brewing takes much longer, the taste may become heavier, more bitter, and less clean.
Still, time should not be judged separately from taste. It only helps you understand whether the brew is flowing correctly.
Basic Drip Bag Coffee Recipe
This recipe works for most drip coffee bags.
Drip bag: 1 piece
Water: 150–190 ml
Temperature: 93–95°C
Cup: tall, at least 250 ml
Brewing time: 2–2.5 minutes
Brewing steps:
- Heat the water to 93–95°C.
- Open the individual package.
- Tear off the top of the drip bag along the perforation line.
- Open the cardboard holders.
- Place the drip bag on a tall cup.
- Pour in a little water to wet the coffee.
- Wait 20–30 seconds.
- Continue pouring water in small portions into the center of the bag.
- Total water amount — 150–190 ml.
- Wait until all the water has passed through the coffee.
- Remove the drip bag and discard it.
- Wait 1–2 minutes for the coffee to cool slightly, then drink.
When coffee cools slightly, the taste becomes easier to read. A drink that is too hot can seem flatter because high temperature dulls taste perception.
How to Know What to Change
The coffee tastes watery
Most likely, you used too much water. Next time, reduce the amount by 20–30 ml. For example, use 160–170 ml instead of 190 ml.
The coffee is too strong or heavy
Try adding a little more water or pouring more calmly, without extending contact with the bag too much.
The coffee tastes sour or underdeveloped
The water may have been too cool, or it may have passed through the bag too quickly. Use water at 93–95°C and add a short 20–30 second bloom.
The coffee tastes bitter or rough
The water may have been too hot, the brew may have taken too long, or the drip bag may have been partly sitting in the brewed coffee. Use a tall cup and remove the bag as soon as the drawdown is finished.
How Drip Bags Differ from Instant Coffee
Instant coffee is coffee extract that has already been brewed and dried into powder or granules. You only need to dissolve it in water.
A drip bag works differently. Inside, there is ground coffee. You are not dissolving extract — you are brewing coffee through a paper filter.
That is why drip bags are closer to filter coffee than to instant coffee. They have a more natural aroma, a more complex taste, and a clearer brewing process.
How Drip Bags Differ from Classic Filter Coffee
Classic filter brewing requires separate equipment: a dripper, filters, grinder, scale, kettle, and server.
A drip bag simplifies that system down to one bag and one cup.
You do not get the full freedom of manual brewing. You get a ready-to-use format with a pre-measured coffee dose and built-in filter. It gives you less control than V60 or Kalita, but much more convenience.
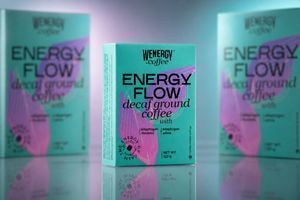
How to Brew WEnergy coffee in a Drip Bag
If you use WEnergy coffee in a drip bag, start with this basic setup:
- cup — tall, at least 250 ml;
- water — 150 ml;
- temperature — 93–95°C;
- pouring — in small portions into the center of the bag;
- time — 2–2.5 minutes.
For a fuller cup, use less water. For a softer cup, use a little more.
A drip bag is convenient because it does not require a separate grind size, filter, or coffee maker. It is a format for situations where you want good coffee without separate brewing equipment: at work, on the road, in a hotel, after training, at school or university, or at home when you do not want to take out your coffee gear.
The Main Point
A drip bag is a simple way to make filter coffee without a coffee maker or special equipment.
The basic setup is simple: 1 drip bag. 150–190 ml of water. Temperature — 93–95°C. Tall cup of at least 250 ml. Total time — 2–2.5 minutes.
It is better to pour water in small portions into the center of the bag. The bag should not sit in the finished drink. After the water has passed through, remove it immediately.
The main mistake is using too much water. That is what most often makes drip bag coffee watery. For a richer taste, start with 150–160 ml. For a softer cup, use 180–190 ml.