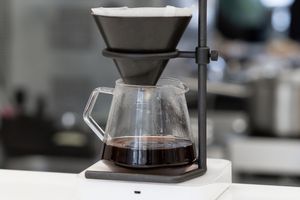

You can make coffee without a coffee maker, French press, V60, or Kalita. All you need is a cup, ground coffee, and hot water.
At first glance, this is the simplest method. Add coffee, pour in water, wait — and that is it. But because it feels so simple, coffee in a cup is often made imprecisely: an approximate amount of coffee, random water temperature, too fine a grind, or too long a wait.
As a result, the drink can turn out cloudy, bitter, watery, or grassy.
Brewing coffee in a cup is an immersion method. The coffee stays in contact with water the whole time, much like in a French press, but without a metal filter and without a plunger.
Because of that, the drink feels fuller, leaves sediment at the bottom, and has a softer texture than coffee brewed through a paper filter. This is not the method for the cleanest possible cup. But it is a practical option when you want good coffee without extra equipment.
What You Need
For a basic brew, you will need:
- ground coffee or whole bean coffee;
- a cup;
- hot water;
- a spoon.
It is useful to have:
- a kitchen scale;
- a timer;
- a coffee grinder;
- a temperature-controlled kettle or thermometer.
A scale and timer are not there to make the process complicated. They are there to make the result repeatable. If the coffee tastes good, you should know how to brew it the same way next time.
Basic Coffee-to-Water Ratio
A practical starting point for brewing in a cup is:
60 g of coffee per 1 liter of water
For home brewing, that looks like this:
| Water Volume | Coffee |
|---|---|
| 200 ml | 12 g |
| 250 ml | 15 g |
| 300 ml | 18 g |
| 350 ml | 21 g |
For a standard 200 ml cup, a convenient starting recipe is:
12 g of coffee per 200 ml of water
If you do not have a scale, that is about 4 teaspoons of ground coffee without a large heap. Still, weighing the coffee is more accurate, because different grind sizes and coffee densities give different volumes in a spoon.
Ratio is not only about strength. It changes how the coffee feels in the mouth: light, full, watery, or rich.
What Grind Size Works for Coffee in a Cup
A medium grind works best for brewing coffee directly in a cup.
Use this as a simple guide:
- finer than French press;
- close to pour-over grind size;
- much coarser than espresso.
If the grind is too fine, the coffee will be cloudier, more bitter, and heavier in sediment. Fine particles stay in the water longer and release unwanted bitterness faster.
If the grind is too coarse, the coffee may taste thin, slightly sour, and underdeveloped.
Start with a medium grind and adjust by taste:
- coffee tastes sour or hollow — make the grind slightly finer;
- coffee tastes bitter, dry, or muddy — make the grind coarser;
- there is too much sediment in the cup — avoid grinding too fine and let the coffee settle longer after stirring.
What Water Works Best
Coffee is made almost entirely of water, so the water composition has a noticeable effect on taste.
For brewing in a cup, it is better to use drinking bottled water or filtered water with moderate mineral content. Water that is too hard can make the taste flatter and rougher. Water that is too soft can sometimes emphasize acidity more than needed.
A practical guide:
- mineral content — about 75–150 mg/l;
- pH — around 7;
- no strong chlorine smell or off-taste.
If your tap water gives tea or coffee an unpleasant taste, use bottled water for brewing.
Water Temperature
A practical temperature range for coffee in a cup is 93–95°C.
The simplest way is to bring the water to a boil and wait about 1–2 minutes. If you have a temperature-controlled kettle, set the temperature directly.
Water that is too hot can increase bitterness, especially if the grind is fine or the coffee is darker roasted. Water that is too cool can make the coffee taste flat, weak, and underdeveloped.
Keep it simple at the start. Use 93–95°C, fix the ratio, grind size, and time. Then change one variable at a time.
What Cup to Choose
A regular cup will work for brewing. But a taller cup with thicker walls is better.
A taller cup is useful because coffee particles settle at the bottom more easily, and less sediment reaches your mouth with the first sips.
Thick walls help retain heat for longer. This matters because coffee in a cup does not pass through a filter and keeps brewing inside the cup. Temperature affects how quickly and how fully the coffee releases its flavor.
Basic 200 ml Cup Recipe
This recipe works for a standard home cup.
Coffee: 12 g
Water: 200 ml
Temperature: 93–95°C
Grind size: medium
First brew: 4 minutes
Settling after stirring: another 4–6 minutes
Brewing steps:
- Heat the water to 93–95°C.
- Add 12 g of ground coffee to the cup.
- Pour in 200 ml of water in a steady, active stream so the coffee mixes well with the water.
- Let it brew for 4 minutes.
- After 4 minutes, gently stir the coffee with a spoon.
- Wait another 4–6 minutes so the coffee particles settle at the bottom.
- Drink slowly without swirling the cup.
- Do not drink the last sip if there is a lot of sediment at the bottom.
Important: after stirring, do not drink the coffee immediately. Let the particles settle. The cup will feel cleaner, although it will still not be as clear as paper-filtered coffee.
250 ml Cup Recipe
For a larger cup, use the same ratio.
Coffee: 15 g
Water: 250 ml
Temperature: 93–95°C
Grind size: medium
First brew: 4 minutes
Settling after stirring: 4–6 minutes
The process is the same: add coffee, pour in hot water, wait 4 minutes, stir, let the particles settle, and drink carefully. For 250 ml, it is especially important not to grind too fine. The more coffee and water you have in the cup, the more sediment can remain in the drink.
Why You Should Stir the Coffee
After pouring, some coffee particles remain on the surface. If you do nothing, extraction will be less even: the top layer contacts water differently from the coffee below.
That is why after 4 minutes it is worth stirring the coffee gently with a spoon. This helps the particles sink and evens out the taste.
But after stirring, you need to wait. If you start drinking immediately, there will be many particles in the cup, and the texture will feel rougher.
How Long to Brew Coffee in a Cup
The basic timing is:
4 minutes of brewing + 4–6 minutes of settling
During the first 4 minutes, the coffee extracts actively. After stirring, the particles gradually settle, and the drink becomes easier to drink.
If you start drinking too early, more fine particles will get into your mouth. If you leave the coffee for too long, it will keep sitting with the grounds, and the taste may become more bitter and dry.
It is best to drink the coffee once it has cooled slightly, but before it has been sitting too long.
How to Know What to Change
The coffee tastes sour, thin, or underdeveloped
Increase extraction. You can make the grind slightly finer, check the water temperature, or increase the first brew time by 30–60 seconds.
The coffee tastes bitter, dry, or heavy
Extraction is likely too high. Make the grind coarser, avoid water that is too hot, and do not leave the coffee sitting for too long.
The coffee tastes watery
The issue may be concentration, not extraction. Use a little more coffee or reduce the amount of water.
There is too much sediment in the cup
The grind may be too fine. Make it coarser, let the coffee settle longer after stirring, and do not drink the last part from the bottom of the cup.
The main rule is: do not change everything at once. First, fix the ratio. Then adjust the grind size. After that, work with temperature and time.
How to Brew WEnergy coffee in a Cup
WEnergy coffee can be brewed directly in a cup if you choose the right grind size and keep the ratio consistent.
For a 200 ml Cup
- water — 200 ml;
- coffee — 12 g;
- temperature — 93–95°C;
- grind size — medium;
- first brew — 4 minutes;
- settling after stirring — 4–6 minutes.
For a 250 ml Cup
- water — 250 ml;
- coffee — 15 g;
- temperature — 93–95°C;
- grind size — medium;
- first brew — 4 minutes;
- settling after stirring — 4–6 minutes.
If you use WEnergy coffee ground for cup brewing, you do not need to find the right grind size yourself. You only need to control the dose, water, temperature, and time.
Coffee in a cup works well when there is no coffee maker or separate brewing device available. It is the simplest way to make coffee, but it still requires accuracy: ratio, grind size, temperature, and time.
The Main Point
Coffee in a cup is not “just pouring boiling water over coffee”. It is an immersion brewing method where coffee stays in contact with water the whole time.
The basic setup is simple: 200 ml of water — 12 g of coffee. 250 ml of water — 15 g of coffee. Temperature — 93–95°C. Grind size — medium. 4 minutes of brewing + 4–6 minutes of settling.
After stirring, let the particles settle at the bottom and do not drink the last sip with sediment.
A medium grind, accurate ratio, hot water at the right temperature, and enough settling time are enough to make coffee in a cup a proper brewing method at home, at the office, or on the go.